

How To Frame A Picture Professionally

Framing pictures is a great way to preserve photographs and artwork to keep them safe for years to come. Take the mystery out of the process with these tips on how to frame pictures like a pro.
Select Photo or Artwork
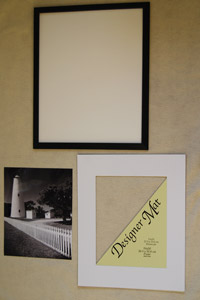
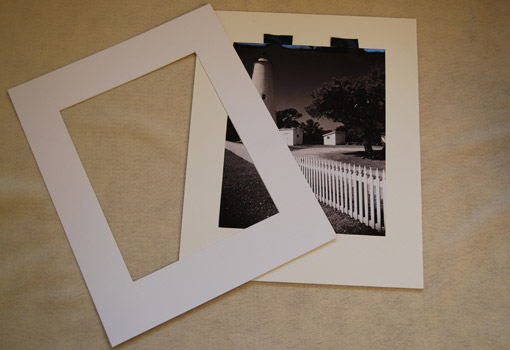
Photo, frame, and mat.
Choose something to frame that you find appealing or valuable, since you will be living with it for a long time. Photos can either be matted or placed directly in a frame.
Purchase Mat and Frame
When looking for a mat and frame, try arts and crafts stores like Michaels, A.C. Moore, Deck the Walls, or The Great Frame Up. The mat and frame should enhance the picture or artwork. In addition to improving the overall look of your picture, a mat provides a gap between the picture and glass.
Size Mat and Frame
Select a mat based on the size of the picture and width of the buffer you would like between the photo and frame. Choose a frame that fits the size of the mat you plan to use. Such as:
- 5 X 7 photo with 8 X 10 mat and frame
- 8 X 10 photo with 11 X 14 mat and frame
- 11 X 14 photo with 16 X 20 mat and frame
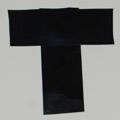
Tape "T"
Choosing a Mat
You can use either a single mat, with no inner border, or a double mat if an inner border is desired. Select a mat color that will complement the photo or artwork. On a double mat, the inside border can act to bring out a color in a picture. To prevent damage to the photo or artwork, only acid-free mat board should be used. The best mat board is made of 100% rag.
Selecting a Frame
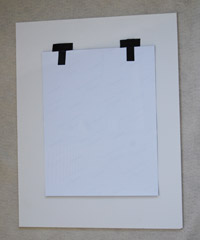
Attach tape to back of picture
The frame should complement the color scheme of the room where it will be hung. For black and white pictures, a thin black frame goes well with a white or grey mat and a black inside border. For sunset pictures, consider a red frame with a white or cream colored mat and a red inside border. The mat and frame colors should work together to enhance the artwork as well as the room where it will be hung.
Mounting Tape
Mount your picture on acid free backboard or foam board with single-sided Scotch Photo and Document tape or single-sided Scotch Scrapbooking tape. Do not use masking tape. Cut 2" long pieces of tape and join them together into a "T" shape with the sticky sides
facing each other.
Attach Tape to Picture
Turn the picture over and attach the tails of the "T" shaped pieces of tape to the top of the back of the picture with the "T" positioned near the edge of the picture without touching it.
Attach tape to backboard
Attach Tape to Backboard
Flip the picture over, center the picture on the backboard, and lightly tape it in place. Hanging the picture from the top will help prevent it from developing ripples.
Align mat
Place the mat lightly on top of the backboard to check the alignment of the picture. Once the picture has been positioned properly, press the tape firmly down on the backboard.
Insert Picture in Frame
Make sure the glass on the inside of the frame is clean before inserting the picture, mat, and backboard into the frame. Use the fasteners provided with the frame to secure the backboard
in the frame. Hang your picture on the wall and enjoy!
Align photo to backboard and mat then place in frame

Pat McNulty is a landscape and wildlife photographer with extensive experience integrating framed images into home décor. His website premierphotography.com offers over 900 beautiful pictures ranging from lighthouses and waterfalls to flowers and animals.
How To Frame A Picture Professionally
Source: https://todayshomeowner.com/how-to-frame-pictures-like-a-pro/
Posted by: clarknoreed.blogspot.com
0 Response to "How To Frame A Picture Professionally"
Post a Comment